ShopItFast can be identified as an adware which may bring annoying advertisements to your browser such as Internet Explorer, Google Chrome and Mozilla Firefox. It can come into your computer along with some free software, files and drivers. You may also get infect by opening spam emails, sharing corrupt, or clicking to unsafe web sites, and so on.

Once installed, ShopItFast will inject its malicious files into your computer and registry entries. It will change and add itself to your startup items. When you start your computer, it will run itself automatically at the background. By taking up a lot of system resources, it slows down your computer performance largely.
When you open your browser, ShopItFast will display a lot of pop-up ads, banners and sponsor link, especially when you visiting online shopping websites. It states that it can help users save money and time when shopping online. However, users may find it does more harm than good. Users keep receiving a lot of pop-up ads, which is really disturbing their online experience. If you click the pop-up links, you will be redirected to other ads webpages. You may also have some unwanted programs downloaded. To protect your computer, you should remove it as soon as possible. You can refer to the following removal guide.
Solutions to delete ShopItFast
Generally speaking, you can uninstall it two methods. You can delete all related items of ShopItFast in a manual way showed below. If that doesn't work, download SpyHunter to help you. It is safe and efficient.
Method 1: Manual Removal Instruction
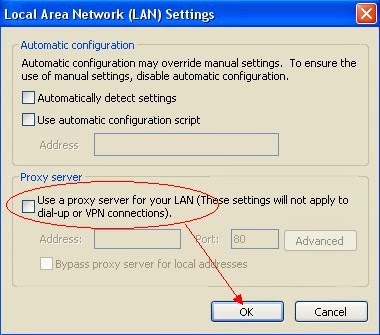
Step 1- Reset Internet Explorer by the following guide (take IE as an example):
Open Internet Explorer >> Click on Tools >> Click on Internet Options >> In the Internet Options window click on the Connections tab >> Then click on the LAN settings button>> Uncheck the check box labeled “Use a proxy server for your LAN” under the Proxy Server section and press OK.
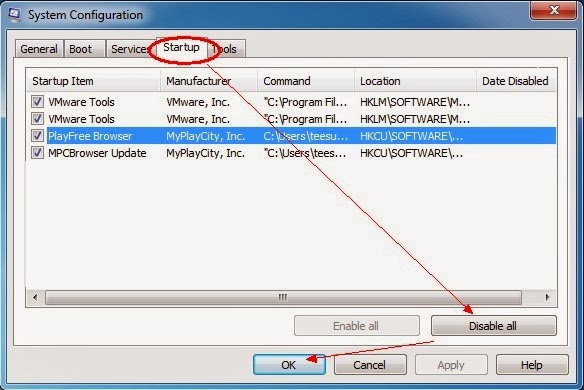
Step 2- Disable any suspicious startup items that are made by infections from ShopItFast
For Windows Xp: Click Start menu -> click Run -> type: msconfig in the Run box -> click Ok to open the System Configuration Utility -> Disable all possible startup items generated from ShopItFast.
For Windows Vista or Windows7: click start menu->type msconfig in the search bar -> open System Configuration Utility -> Disable all possible startup items generated from ShopItFast.
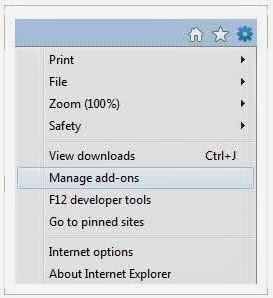
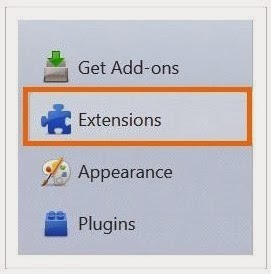
Step 3- Remove add-ons:
Internet Explorer
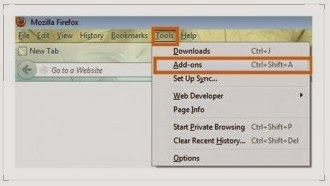
1) Go to 'Tools' → 'Manage Add-ons';
2) Choose 'Search Providers' → choose 'Bing' search engine or 'Google' search engine and make it default;
3) Select 'Search Results' and click 'Remove' to remove it;
4) Go to 'Tools' → 'Internet Options', select 'General tab' and click 'Use default' button or enter your own website, e.g. Google.com. Click OK to save the changes.
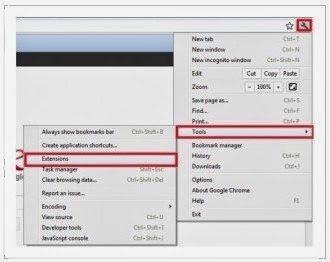
Google Chrome
1) Click on 'Customize and control' Google Chrome icon, select 'Settings';
2) Choose 'Basic Options'.
3) Change Google Chrome's homepage to google.com or any other and click the 'Manage search engines...' button;
4) Select 'Google' from the list and make it your default search engine;
5) Select 'Search Results' from the list remove it by clicking the "X" mark.
Mozilla Firefox
1) Click on the magnifier's icon and select 'Manage Search Engines....';
2) Choose 'Search Results' from the list and click 'Remove' and OK to save changes;
3) Go to 'Tools' → 'Options'. Reset the startup homepage or change it to google.com under the 'General tab';
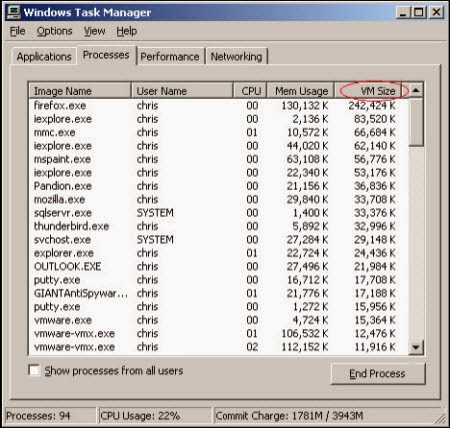
Step 4- Open Windows Task Manager and close all running processes.
( Methods to open Task Manager: Press CTRL+ALT+DEL or CTRL+SHIFT+ESC or Press the Start button->click on the Run option->Type in taskmgr and press OK.)
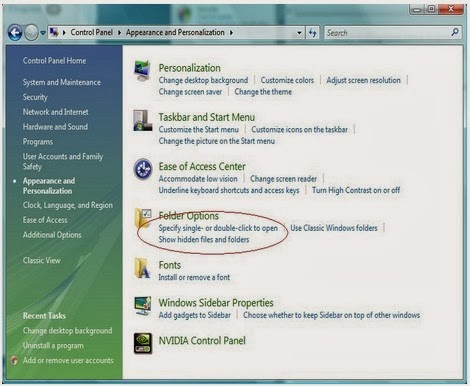
Step 5- Show all hidden files
Open Control Panel from Start menu and search for Folder Options. When you’re in Folder Options window, please click on its View tab, check Show hidden files and folders and uncheck Hide protected operating system files (Recommended) and then press OK.

Step 6- Remove these associated Files on your hard drive such as:
%AllUsersProfile%\Application Data\random.exe
%ProgramFiles%\ ShopItFast.exe
%ProgramFiles%\random.exe
Step 7- Open the Registry Editor and delete the following entries:
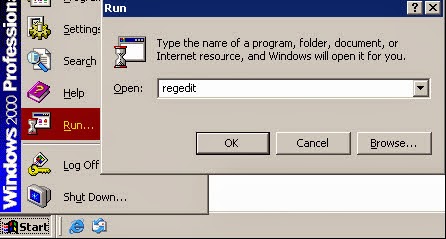
(Steps: Hit Win+R keys and then type regedit in Run box and click on OK)
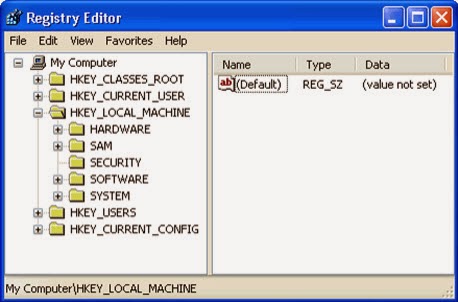
HKEY_LOCAL_MACHINE\Software\ ShopItFast
HKEY_LOCAL_MACHINE\Software\ random.exe
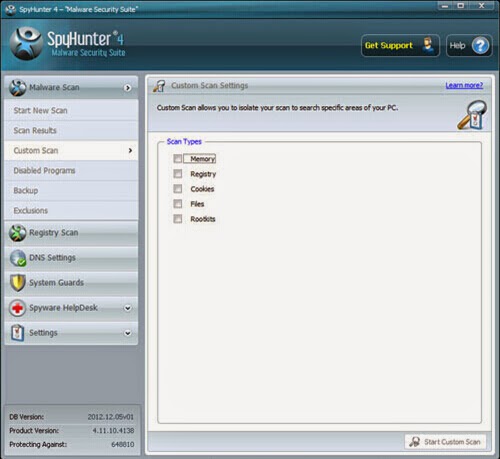
Method 2: Automatic Removal with SpyHunter
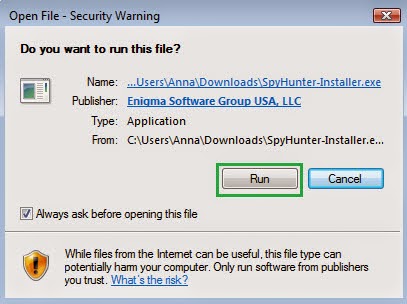
Step 1- Download SpyHunter by pressing the following button.
The video direction below can give you a hand
Conclusion: SpyHunter is one of the most useful and trustworthy anti-spy tool. It can start a quick or full scan in your computer under your command and expose threats you seldom notice. Once it is installed, you don't need to do such complicated things showed in the manual solution, what you need to do is just to press certain buttons. It's very convenient. If you are interested, click the following button to install it.
No comments:
Post a Comment