With many pop ups come from Jck.drivesection.net? Try to stop it but end up with failure? The step-by-step guides in this article can help you safely and quickly remove Jck.drivesection.net.
Description of Jck.drivesection.net
Jck.drivesection.net is classified as adware that comes into your computer system without your notice and permission. It can affect browsers like Internet Explorer, Google Chrome, Mozilla Firefox and other frequently-used browsers. You may get infected by mistakenly clicking to malicious links and websites, downloading unknown freeware from the internet, opening spam e-mail attachments or get it from an infected USB.

Once Jck.drivesection.net is installed on the PC, it will display pop-ups ads, banners and sponsor links on the webpage you visit. Some pop-ups will ask you to update or install some programs, but you will get other unwanted programs download and they will mess up your computer system. Some pop-up ads seem to be very attractive, but it is just a trick to help the cyber criminals to collect money.
Jck.drivesection.net will keep record of your online activities, collect personal data and send to the cyber criminals. By clicking to the malicious links, you may get other infections such as spyware, ransomware and Trojan horse. Trojan will help the hackers to get into your computer and remotely control your computer to do malicious activities. It is recommended to remove this infection as soon as possible.
Technical details for removing Jck.drivesection.net manually
To manually get rid of Jck.drivesection.net virus, it’s to end processes, unregister DLL files, search and uninstall all other files and registry entries. Follow the manual removal guide below to start.
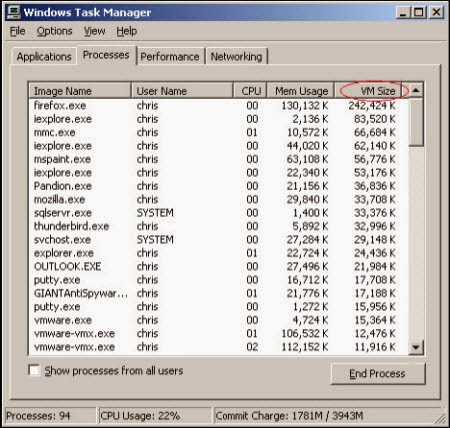
1: Stop Jck.drivesection.net running processes in Windows Task Manager first.
( Methods to open Task Manager: Press CTRL+ALT+DEL or CTRL+SHIFT+ESC or Press the Start button->click on the Run option->Type in taskmgr and press OK.)
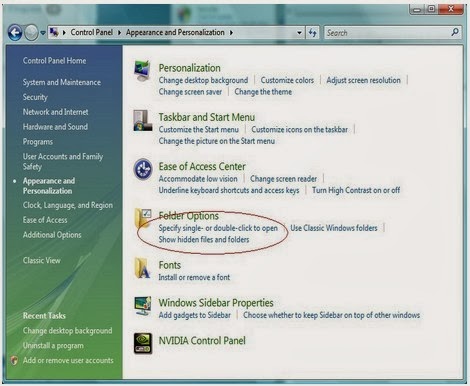
2: Open Control Panel in Start menu and search for Folder Options. When you’re in Folder Options window, please click on its View tab, tick Show hidden files and folders and non-tick Hide protected operating system files (Recommended) and then press OK.

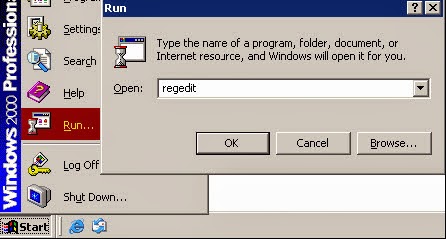
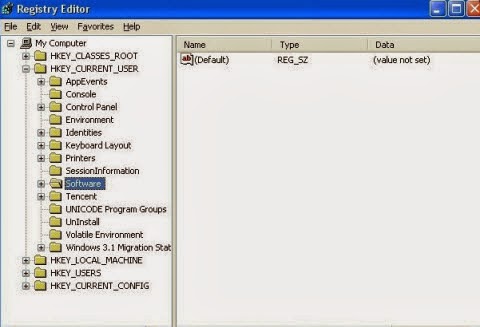
3: Go to the Registry Editor and remove all Jck.drivesection.net registry entries listed here:
(Steps: Hit Win+R keys and then type regedit in Run box to search)
HKEY_CURRENT_USER\Software\Microsoft\InternetExplorer\TabbedBrowsing "NewTabPageShow" = "1"
HKEY_CURRENT_USER\Software\Microsoft\Internet Explorer\Main "Start Page" = "
HKEY_LOCAL_MACHINE\SOFTWARE\Jck.drivesection.net
4:Get rid of the listed files created by Jck.drivesection.net
%AppData%\ Jck.drivesection.net.exe
%CommonAppData%\ Jck.drivesection.net.exe
5: Remove add-ons:
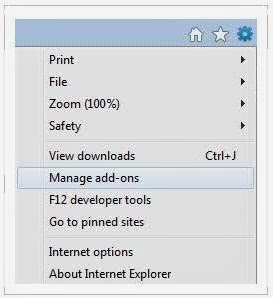
Internet Explorer
1) Go to 'Tools' → 'Manage Add-ons';
2) Choose 'Search Providers' → choose 'Bing' search engine or 'Google' search engine and make it default;
3) Select 'Search Results' and click 'Remove' to remove it;
4) Go to 'Tools' → 'Internet Options', select 'General tab' and click 'Use default' button or enter your own website, e.g. Google.com. Click OK to save the changes.
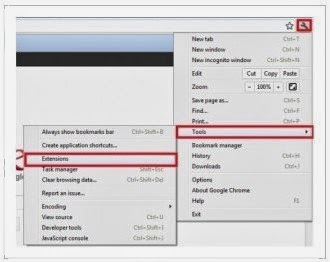
Google Chrome
1) Click on 'Customize and control' Google Chrome icon, select 'Settings';
2) Choose 'Basic Options'.
3) Change Google Chrome's homepage to google.com or any other and click the 'Manage search engines...' button;
4) Select 'Google' from the list and make it your default search engine;
5) Select 'Search Results' from the list remove it by clicking the "X" mark.
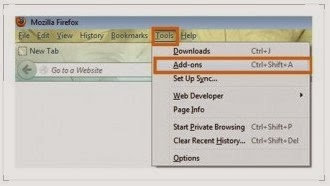
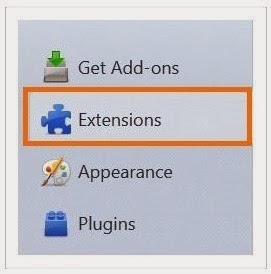
Mozilla Firefox
1) Click on the magnifier's icon and select 'Manage Search Engines....';
2) Choose 'Search Results' from the list and click 'Remove' and OK to save changes;
3) Go to 'Tools' → 'Options'. Reset the startup homepage or change it to google.com under the 'General tab';
6: Disable proxy
1. Click on Tools on the menu bar
2. Select Internet options
3. Go to Connections tab
4. Select LAN settings at the bottom of the dialog
5. Under the Proxy sever, untick 'use a proxy server for your LAN (These settings will not apply to dial-up or VPN connections).'
6. Click OK

Technical details for removing Jck.drivesection.net automatically with SpyHunter
SpyHunter is an useful antivirus. To remove it with SpyHunter means using SpyHunter as your safeguard to stop malicious programs from running and protect your computer with regular scan.
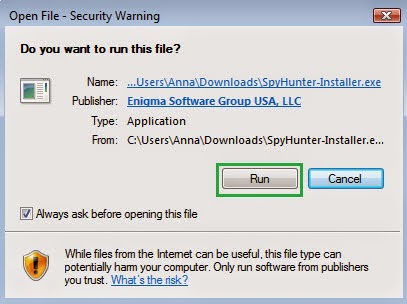
1: Click on the Download button and save its application into your computer.
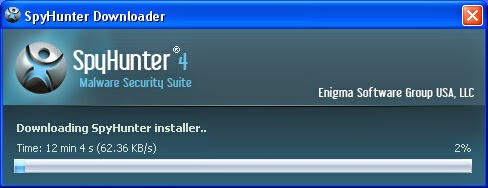
2: Then a prompt box will pop up to ask you if you will run it, click Run and wait for its installation.
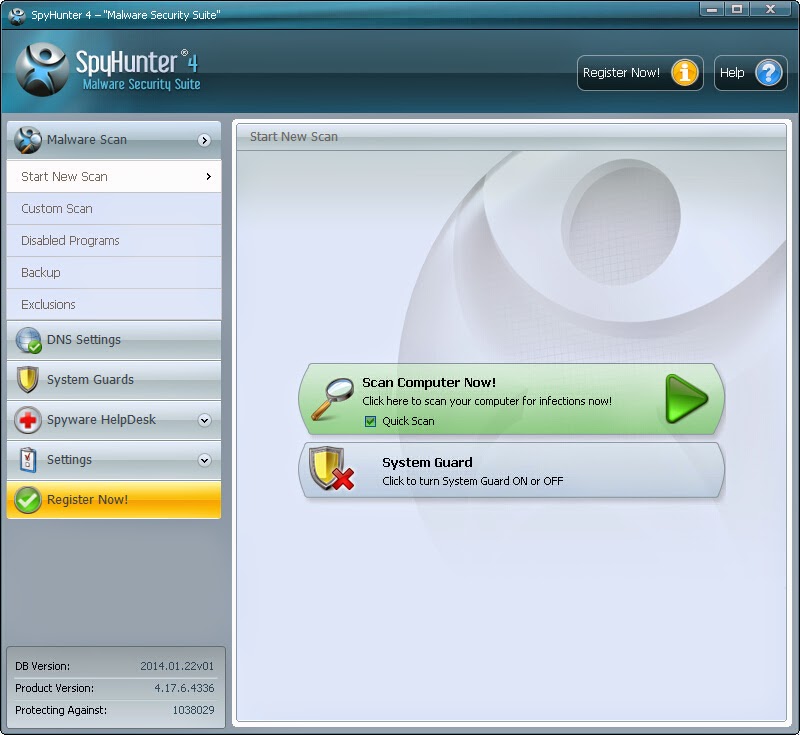
3: When it finishes installation, click on the Scan Computer Now button to begin scanning, when it displays the final report of detected threats, remove them.
The below video is for your reference
NOTE: SpyHunter is one of the most useful and trustworthy anti-spy tool. It can start a quick or full scan in your computer under your command and expose threats you seldom notice. Once it is installed, you don't need to do such complicated things showed in the manual solution, what you need to do is just to press certain buttons. It's very convenient. If you are interested, click the following button to install it.
No comments:
Post a Comment