Is your computer infected with the View That pop up? No worries, you can refer to the manual and automatic removal guides in this post.
Screenshot of View That

Information of View That
View That ads can appear on your browser like Google Chrome, Internet Explorer and Mozilla Firefox. This View That is displayed by a specific website to ask you to download some player or pictures to have a better watching experience. This is a adware created by the creator to get revenue by generating traffics. Once infected, it will change the registry entries and browser setting. When you open your browsers, it will pop up randomly automatically without your permission.
The popping up windows of View That keeps asking yo to download its programs which is very annoying. If you follow its steps to continue, you will install many other unknown programs. Those unwanted programs will consume a lot of system resources and slow down the PC performance. Some malicious application will modify your system files and add many junk files. In this case, your computer will be mess up. It is not safe to keep this on the computer, It is suggested to remove as soon as possible.
The popping up windows of View That keeps asking yo to download its programs which is very annoying. If you follow its steps to continue, you will install many other unknown programs. Those unwanted programs will consume a lot of system resources and slow down the PC performance. Some malicious application will modify your system files and add many junk files. In this case, your computer will be mess up. It is not safe to keep this on the computer, It is suggested to remove as soon as possible.
Steps to remove View That
First, you can remove it manually in the safe mood, System Configuration and so on. If that doesn't work, go to install anti-malware programs. SpyHunter, as one of the most popular ones, can fix this problem for you without your great effort.
First:
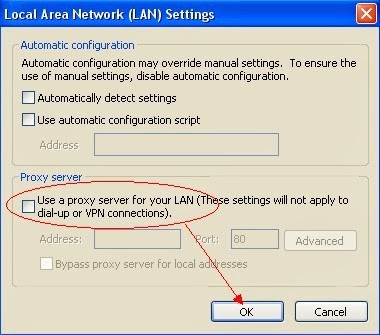
Step 1- Reset Internet Explorer by the following guide (take IE as an example):
Open Internet Explorer >> Click on Tools >> Click on Internet Options >> In the Internet Options window click on the Connections tab >> Then click on the LAN settings button>> Uncheck the check box labeled “Use a proxy server for your LAN” under the Proxy Server section and press OK.
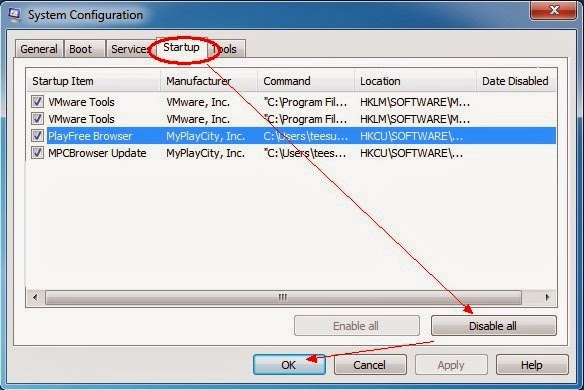
Step 2- Disable any suspicious startup items that are made by infections from View That
For Windows Xp: Click Start menu -> click Run -> type: msconfig in the Run box -> click Ok to open the System Configuration Utility -> Disable all possible startup items generated from View That.
For Windows Vista or Windows7: click start menu->type msconfig in the search bar -> open System Configuration Utility -> Disable all possible startup items generated from View That.
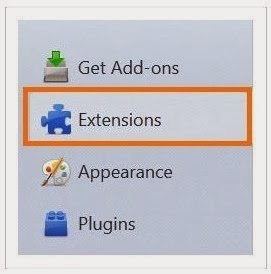
Step 3- Remove add-ons:
Internet Explorer
1) Go to 'Tools' → 'Manage Add-ons';
2) Choose 'Search Providers' → choose 'Bing' search engine or 'Google' search engine and make it default;
3) Select 'Search Results' and click 'Remove' to remove it;
4) Go to 'Tools' → 'Internet Options', select 'General tab' and click 'Use default' button or enter your own website, e.g. Google.com. Click OK to save the changes.

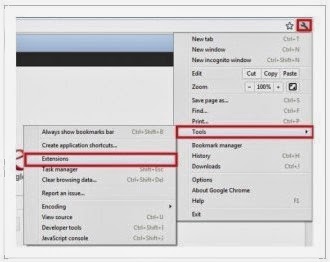
Google Chrome
1) Click on 'Customize and control' Google Chrome icon, select 'Settings';
2) Choose 'Basic Options'.
3) Change Google Chrome's homepage to google.com or any other and click the 'Manage search engines...' button;
4) Select 'Google' from the list and make it your default search engine;
5) Select 'Search Results' from the list remove it by clicking the "X" mark.
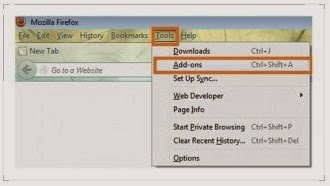
Mozilla Firefox
1) Click on the magnifier's icon and select 'Manage Search Engines....';
2) Choose 'Search Results' from the list and click 'Remove' and OK to save changes;
3) Go to 'Tools' → 'Options'. Reset the startup homepage or change it to google.com under the 'General tab';
Step 4- Open Windows Task Manager and close all running processes.
( Methods to open Task Manager: Press CTRL+ALT+DEL or CTRL+SHIFT+ESC or Press the Start button->click on the Run option->Type in taskmgr and press OK.)

Step 5- Clear all the cookies of your affected web browsers.
Since the tricky virus has the ability to use cookies for tracing and tracking the internet activity of users, it is suggested users to delete all the cookies before a complete removal.
Google Chrome:
Click on the "Tools" menu and select "Options".
Click the "Under the Bonnet" tab, locate the "Privacy" section and Click the "Clear browsing data" button.
Select "Delete cookies and other site data" and clean up all cookies from the list.
Mozilla Firefox:
Click on Tools, then Options, select Privacy
Click "Remove individual cookies"
In the Cookies panel, click on "Show Cookies"
To remove a single cookie click on the entry in the list and click on the "Remove Cookie button"
To remove all cookies click on the "Remove All Cookies button"
Internet Explorer:
Open Internet explorer window
Click the "Tools" button
Point to "safety" and then click "delete browsing history"
Tick the "cookies" box and then click “delete”
Then, if steps above doesn't come to effect, try the following one with SpyHunter
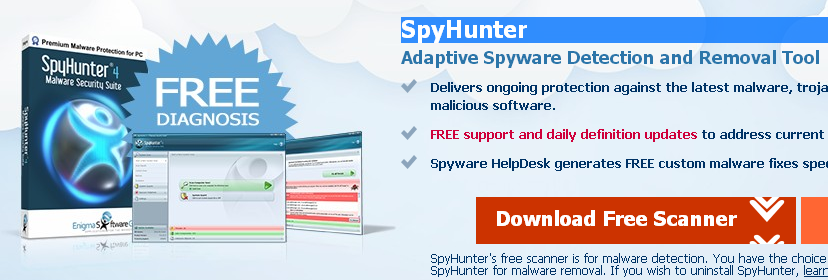
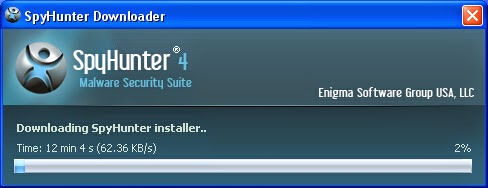
Step 1: Download the free scanner of SpyHunter into your computer.

Step 2: Install it into computer step by step.
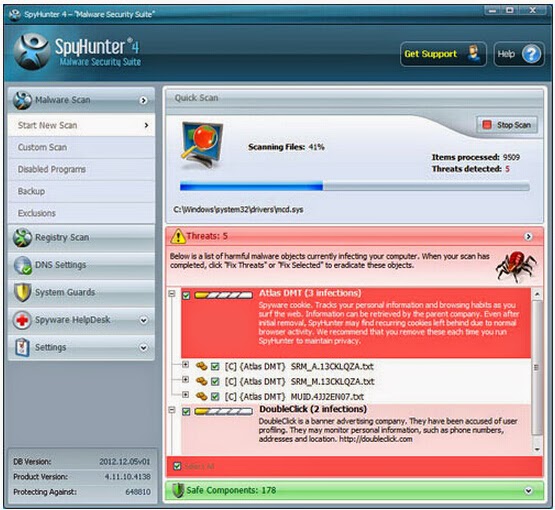
Step 3: When it succeeds in installing, make it scan your computer and remove all potential threats by pressing Remove.
:
The video direction below can give you a hand
Conclusion: As you can see, the latter choice with SpyHunter is more favorable. Because it can scan threats and also can prevent your computer from being invaded by viruses, malware or Trojans. Welcome to download it.
No comments:
Post a Comment